Pages

Monday, February 29, 2016

Mother Goose Inspired Card featuring "Ginger"!!

Hey everyone, I hope you all had a great weekend!! For today's post, I have a card I created for the Jiggery Makery blog. I combined the "Ginger" image from the shop with some Graphic 45 papers to create unique card.
                                                      Here's the pic for you to check out:


The card measures 4 1/4" x 6" and uses a sheet of craft card stock for the base.
For my card layers, I selected a few patterned papers from the "Mother Goose" 8" x 8" paper pad from Graphic 45.
Then, I cut the floral paper at 4" x 5 3/4,"  and the text paper at 3 1/2" x 5 1/4".
I layered the papers on top of each other and attached them to the card base using my tape runner.
Next, I set the card aside to work to the image.

I colored her in using my alcohol markers, and here's a rundown of the colors I used:
-Skin- Ivory, Vanilla, R20
-Hair- E70, E29, E79
-Dress- Y13, Y15, Y18
-Hat & Accessories- R17, R27, Linen, Maple
-Flower, Pot & Watering Can- RV000, RV55, B14, E97, E99, E29
-Grass- G46, G28


I added my Wink of Stella glitter pen to add a little sparkle to her dress and gloves.
I then hand drew a fence behind the image and colored it in using my C01 & C03 Copic markers. 
I used my G46 & G28 markers to color in some grass along the bottom.

Next, I trimmed the image panel down to 3 1/4" x 5 1/8" and attached it to the card base.
As a finishing touch, I added the sentiment "Mary, Mary quite Contrary" from one of the cut-a-parts in the collection.
Finally, I added a few dash lines around the edge of the card using my white gel pen.

And voila!! Card complete!! 


I hope you enjoyed this card for today!!
Thanks for stopping by, and enjoy the rest of your day!! :)


 Post edited by: Shyann Martinez


Sunday, February 28, 2016

Sparkly Birthday Card!!

Hey everyone, happy Sunday to you all!! I hope your day is off to a relaxing start! For today's post, I have a birthday card I created for the latest challenge over at the Glitter N' Sparkle challenge blog!
The theme for this  week's challenge is "Things with Wings." Please make sure to head over to the Glitter N' Sparkle blog to play along and link up all your "Things with Wings," crafty creations.
As always we have some great sponsors lined up, and they are graciously offering some wonderful prizes for our Top 3 winners.
                                                         
                                                                    - Bugaboo
                                                             - Sparkle N Sprinkle
                                                           - Morgan's Art World
                                                              -Di's Digi Designs  

                                                   Here's the pic for you to check out:


The card measures 4 3/8" x 6 3/4" using a sheet of white card stock as the base.
For the image I used this beautiful digi, "Stardust Fantasy Fairy 1," from Morgan's Art World.
I used my alcohol markers to color her in. Here's a rundown of the colors I used:
                                                       
                                                            -Skin- FS9, Beige, R20
                                                            -Hair- E70, E29, E79
                      -Dress & Wings- V20, V22, RV63, RV55, G40, G43, Y13, Y18, RV000


 I added sparkle to her dress and wings using my Wink of Stella glitter pen.

 Then I inked the background using some Stampin' Up ink pads in "Bashful Blue", "Bliss Blue" and "Mauve Mist".
Next, I colored the ground beneath her feet using my G94 & G99 Copic markers.
I used an oval stencil to trace the shape around the image and fussy cut it out.
I then took that same stencil and traced it on to a sheet of white card stock that I trimmed down to 4 1/8" x 6 1/2".
I used my Xacto blade to cut the oval out and ran it through my Cuttlebug using a Darice "Butterfly" embossing folder.

Next, I lined up the frame and image on my card base and marked out the placement with a pencil.
I then adhered the image directly to the base and used pop dots to attach the frame on top.

To finish the card off , I added the "Birthday Wishes" sentiment from Avery Elle along the bottom and added a few sequins.

                                                         And ta-da!! Card complete!!


                                                  I hope you enjoyed this card for today!!
                                   Thanks for stopping by and enjoy the rest of your Sunday!! :)


Post edited by: Shyann Martinez

Saturday, February 27, 2016

First Ever Art Journal Page featuring Scrap N Dipity images!!

 Hey everyone, happy Saturday to you all!! It's my turn this week to be featured on the Scrap N' Dipity blog. For my project today, I decided to try my hand at something a little different, an art journal. I have been wanting to try to do one for a while now, but never really had the time. So last week I decided I would give it a try and see how it goes. I had a lot of fun creating this page and I look forward to doing a few more. Luckily, I had this wonderful image from the Scrap N' Dipity shop, "Wind in my Hair Fairy," to inspire me.

                                                     Here's the pic for you to check out:


For this art journal page, I'm used a 5 1/2"x 8 1/2" sketchbook I picked up at Hobby Lobby.
To start things off, I first primed my pages using gesso.
Then using some gel medium, I adhered a sheet of tissue paper over the top.
Next, I added some texture to the background using a stencil and some sparkly texture paste.
I added color using my Acqua Dolce & Squid Ink Gelatos from Faber Castell.
I used my heat tool to dry everything.

Next, I used a Hero Arts "Art, Life, Beauty" rubber stamp to add some text to the background.
I used my MementoLuxe Tuxedo Black ink pad made especially for mixed media to stamp the text.
I then stamped a few flourishes using my Inkadinkado "Flourishes" stamp along the opposite corners.
I also ran the black ink pad along the edges and then heat set it.

With my background complete, it was now time to work on the image and other elements I would be using for the pages.
First off, I colored the image in using my alcohol markers. Here's a rundown of the colors I used:
                                                      
                                                            -Skin- FS9, Beige, R20
                                                            -Hair- E70, E29, E79
                                                            -Flowers- RV52, RV63


I fussy cut the image out and added some vellum for the wing.
Then I set it aside to work on the grass layer.
I drew in some grass, colored it in using my G94 & G99 Copic markers, and fussy cut it out.
I adhered it along the bottom of the pages.
Next, I tucked the fairy image behind a few blades of grass to make her look like a part of the scene.

I drew a tree branch, colored it in using my E29 &E79 Copic markers, and fussy cut it out.
I adhered along the top right corner of the page.
Next I die cut a few flowers using my Cuttlebug and some patterned papers.
Then I scattered the flowers throughout the pages, making sure to add some to the tree branch and behind the blades of grass.
I also added a few butterflies that I fussy cut out of some patterned paper.


To make the elements a part of the background, I used my Recollections black water color marker  around each of the elements.
Then, to move the color around a bit used a baby wipe.
I added a few pearls to the flower centers and some paint splatters.

Lastly, I used my Inkadinkado Alpha stamp sets to add the sentiment, " Without change, there would be no Butterflies". I found this quote on Pinterest and thought it would be fitting for this page.

                                                   And voila!! Art Journal page done!!


                                              I hope you enjoyed this project for today!!
                                     Thanks for stopping by and enjoy the rest of  your day!! :)


Post edited by: Shyann Martinez


Friday, February 26, 2016

Quick & Easy Treat Bags featuring LBBS Stamps!!

Hey everyone, happy Thursday to you all!! I hope your day is off to a great start! For today's post, I have a set of treat bags I made using the newest image to be released from the Little Blue Button Stamps shop. To check out all the new releases for this month, please head over to the LBBS shop.
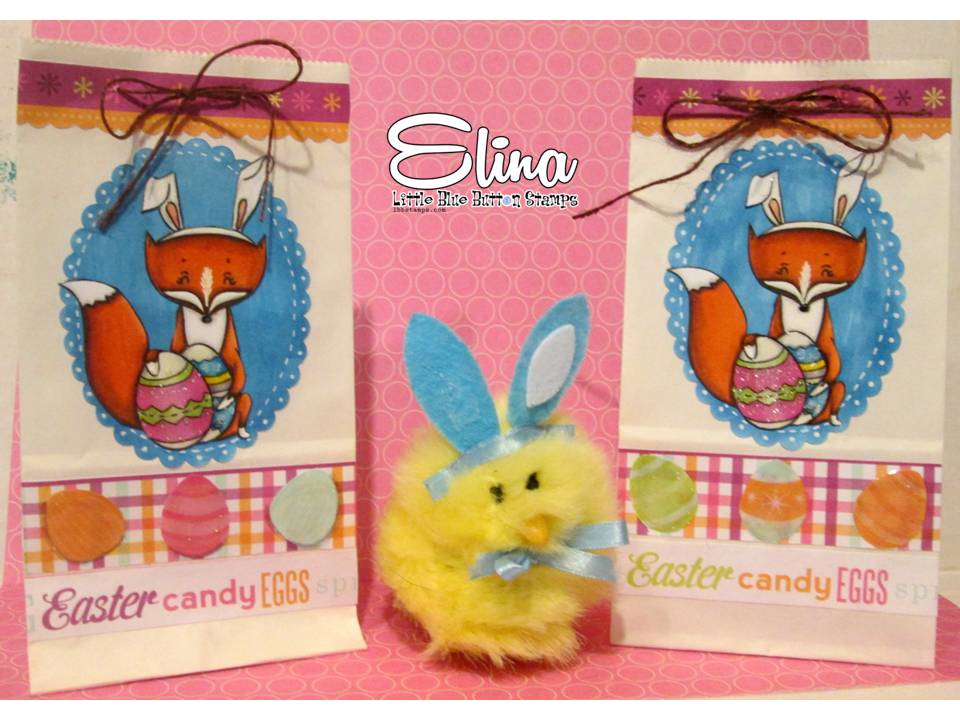
                                         Here's the pic of the treat bags for you to check out:

The treat bags I picked up at my local Hobby Lobby store, they come in a set of 16 and in a variety of colors.
I used a 12" x 12" Easter patterned paper to decorate the front of the bag.
I cut apart the borders and text and added them along the top and bottom.
Next, I fussy cut a few of the eggs from the paper and adhered them on top of the plaid border.
I kept the design pretty much the same for both bags; just changing up the eggs along the bottom.


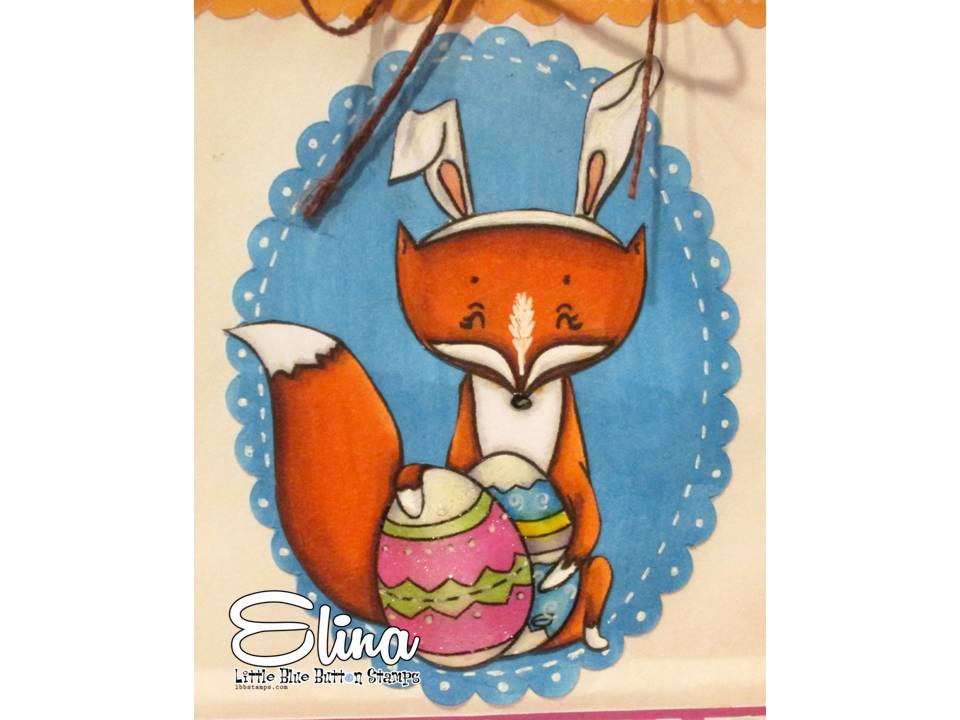
                             For the image I used the new "Easter Fox" digi from the LBBS shop.
             I colored him in using my alcohol markers, and here's a rundown of  the colors I used:
                                                              -Fox- E97, E99, E29
                  -Bunny Hat & Eggs- C0, C04, RV63, RV55, G40, G43, B12, B14, Y13, Y15 


                             I added some sparkle to the eggs using my Wink of Stella pen.
   I then fussy cut the image out and adhered it to a scalloped oval I cut from my Cricut Explore.
                                     I colored the oval in using my B14 Copic marker.

To finish the treat bags off, I added dash lines and dots to the oval, punched four holes (two per bag)                                   and threaded some brown jute cording that I tied in a bow.

                                                      And voila!! Treat Bags complete!!


                                              I hope you enjoyed this project for today!!
                                  My blog has gone through a bit of change this week.
               This September my blog will turn 3 and I thought she was due for an upgrade.
So feel free to take a few moments to have a look around and leave me a comment to let me know                                                               what you think so far.
There are still a few things I would like to add, but I'm happy to say that I now have a blog button!!
              So feel free to check the side bar, copy the link and display it on your blog.
                                  Thanks for stopping by and enjoy the rest of your day!! :)


Post edited by: Shyann Martinez


Monday, February 22, 2016

"Sending Good Vibes"- Quick & Easy Card!!

Hey everyone, I hope your week is off to great start!! For today's post, I have a quick and easy card to share using an image from the Jiggery Makery shop. I kept the card design simple and I used the beautiful, Grace from the Etsy shop.

Please make sure to head over to the shop if you would like to purchase the image featured.

                                                      Here's the pic for you to check out:


The card measures 5 3/8" x 6" and uses a sheet of craft card stock for the base.
The card layer is a sheet of patterned paper from a DCWV "Violet Stack" paper pad that I trimmed down about an 1/8" smaller than the card base.
I inked the edges using some Chocolate Chip ink from Stampin Up and my ink blender tool.
I then adhered the card layer to the card base and set it aside to work on the image.

For the image, I colored her in using my alcohol markers. Here's a rundown of the colors I used:

                                                      -Skin- FS9, Beige, R20
                                                      -Hair- E97, E99, E29
                                                      -Shirt- G40, G43, G46
                                                      -Shorts- B14, B18, 
                                                      -Hat, Belt & Shoes- E29, E79


To add some extra details to her outfit, I used my white gel pen and fine tip black marker to create a plaid pattern on her shirt and hat.
I also added some stitching lines to her shorts using the white gel pen.
Then I added some sparkle to her outfit using my Wink of Stella Glitter pen.


I trimmed the image panel to 3 1/2" x 5 7/8", inked the edges and added some ground beneath her using my C0 & C04 markers.
 I used my Avery Elle  "Sending You" stamp set to stamp the dash lines and sentiment.
Next I added the panel to the card.
And finally I added few sequins to complete the look.

                                                          And ta-da!! Card complete!!


                                                   I hope you enjoyed this card for today!
                                     Thanks for stopping by and enjoy the rest of your day!! :)


 Post edited by: Shyann Martinez


Sunday, February 21, 2016

Re-Purposed Nursery Wall Hanging!!

Hey everyone, happy Sunday to you all!! I hope your day is off to a relaxing start! For today's post, I have a re-purposed project I created for the latest challenge over at the Glitter N Sparkle challenge blog! The theme is "Anything Goes," so please make sure to link up your crafty projects. We have some great sponsors lined up for this challenge, who are graciously offering prize packs to our top 3 winners.
                                                                           
                                                         
                                                                     -Cute as a Button
                                                   
                                                                                                          
                                                                     -Sunsational Stamps
                                           
                                             
                                                                      -Crafty Sentiments

For this project,  I took a floating shelf, one you might at your local home store or IKEA, added paper to the background; some die cuts, and a pair of adorable teddy bear images. The end result is a unique piece of wall art that matches the color scheme of my niece's nursery.
                                                   Here's the pic for you to check out:


The shelf measures 10 1/4" x 11 3/4".
I mod-podged some patterned papers from Recollections and Heidi Swapp to cover the shelf.
Then, I inked the edges with some Chocolate Chip ink from Stampin Up.
I die cut a rocking horse and rattle from my Cricut Explore out of white card stock.
I then used my RV63, RV55, G40, G43, C0, C04 markers to add color to the pieces.
Next, I used some tacky glue to adhere them to the background.

To create the frames on the wall, I used a Recollections stamp, Versa-Mark ink pad, and some white embossing powder to stamp them on a scrap piece of white card stock.
I then stamped some images inside the frames using a set of Stampin' Up rubber stamps.
I used my alcohol markers to color the images in, trimmed out the frames and adhered them to the background.

For the top of the shelf, I die cut a few squares from my Cricut Explore out a sheet of tan card stock.
I used my Heidi Swapp wood grain background stamp to add texture to the squares.
I added a frame and a letter to each of the squares to mimic the look of alphabet blocks.
Next, I added some sparkle to the frames and letters using my Wink of Stella pen.
I then added some Glossy Accents to finish them off. 
To dress up the shelf a little more, I adhered a strip of eyelet lace trim.

For the image, I used this A Gentle Touch image from Crafty Sentiments.
I colored them up using my alcohol markers.
Here's a list of the colors I used:
-Fur- E97, E99, E29, E70, E74, E79, TN7, TN8
-Bowtie, Bow & Collar- G40, G43, RV63, RV55

There's also a tutorial up on my channel, that shows you how I created the furry texture on the bears.
                                                         Just click the link below to check it out:


                                             And ta-da!! Re-Purposed Wall Decor complete!!


                                                 I hope you enjoyed this project for today!!
                  Thanks for stopping by; enjoy the rest of your Sunday, and as always, peace!! :)


Post edited by: Shyann Martinez

Wednesday, February 17, 2016

Marie Antoinette Inspired Shoes!!

Hey everyone, happy "Hump" day to you all!! I hope your Wednesday is off to a great start!! Before I get to today's project, just wanted to share some exciting news with you: I'm a Design Team member for the Decorate to Celebrate  blog!
I'm happy to be a part of this wonderful team of card makers and crafters.
So, for my first project as a design team member, I thought I would create something a little different.

On my Pinterest pin board, "Paper crafting Ideas", I pinned a set of Marie Antoinette inspired shoes.
I really loved the image but I wasn't sure if this was a project I would attempt.
So over the weekend I was deciding what I should make for this first challenge when I stumbled upon this pin on my board.
After checking out the site that the pin was from and the tutorial, I thought I would give it a try.
The instructions were clear and straightforward so it was pretty easy to assemble.

Here's the link to the site where I found the tutorial: Artful Affirmations

And here's the pic of the shoe I created:


I followed the directions I found in the tutorial but changed it up a bit.
Using the free template, I cut out the patterns for the shoe base, front and back three times, instead of twice.
I used craft card stock and layered the pieces together to make it sturdier.
I also added a heel that I made from brown card stock.

Before assembling the shoe, I covered each of the sections using patterned papers from the "Kirby Teesdale" 12" x 12" paper pad.
I inked the edges using some Chocolate Chip ink from Stampin Up.
Next, I assembled the shoe, covered the bottom with some brown card stock, and attached the heel.
Now to the fun part: The Decorations!

First, I glued some black rickrack trim along the front and back of the shoe.
To the back of the shoe I added some pink lace trim and more of the rickrack trim.
For the front of the shoe, I added a pink lace ruffle embellished with pearls.
To dress it up even further, I added a lace flower I made and paired it with a Finnabair Mechanicals "Vintage Trinkets".
I dotted the trinket with some more pearls and added flourishes and a rolled rose to the center.


For the heel of the shoe, I glued on some of the rickrack trim, added smaller rolled roses and flourishes.
As a final touch, I added a lace butterfly sticker from my stash and tucked white lace inside.


And voila!! Shoe complete!! 


I hope you enjoyed this project for today!!
This was a fun one to make so make sure to click the link above to give this one a try.
I think these shoes would be perfect for a bridal shower, lunch with the girls, gift swaps, or just to decorate your home.
Thanks for stopping by; enjoy the rest of your day, and as always, peace!! :)


Pin It Button